
As a diary of my cycling activities, I use a combination of Strava (with Stravistix) and Veloviewer. I use Strava to share the rides (read: collect kudos, Strava’s name for what are likes on Facebook), Stravistix to monitor my fitness (which usually requires power meter data, but can be approximated by Stravistix from heart rate alone) and to beef up segment analysis (gives me a color-coded ranking for all segments of a ride – massive boost in speed), and Veloviewer to archive rides and crunch my annual numbers. One cool feature of Veloviewer is a map view of all my activities. The image below is a map of my activities in Lombardy as it looked like before the weekend.

This nicely shows some clusters. Naturally, the agricultural areas Southwest of Milan, which are easily accessible from where we life. The mountains North of Varese, the central area of Lago di Como and the valleys North of Bergamo. Obviously, I’ve done a lot of climbing in the area, and it so happens that I have to start to put more effort to avoid taking the same roads. That’s generally no problem, but I prefer new roads when possible. Even in my local rides around Milan, I try to have at least a tiny bit of variation every single time I leave the house. My PhD supervisor from Rotterdam, who happens to also be a road cyclist, is the extreme opposite of that. He basically has two routes – one in Rotterdam, one in his home town – and every time he goes training, he follows one of the two.
Not only am I variety-seeking, but I’m also goal-driven. Since I have this map, I have the idea to form an as-much-as-possible connected network of bike rides. This is already hampered by the fact that I only have GPS ride data starting in 2013, and I’m missing my first two Transalps, half of my Dutch adventures, and all of what I did in Berlin. They say if it ain’t on Strava it never happened. Well, it’s on Strava, manually transferred from my old training diary (that was VeloHero, from which I was driven away when it got more difficult to crunch the numbers for some ways of comparing data across years). But it’s not on my Veloviewer map. Too bad.
Long intro short: The girl was off for two days with a friend from university, so I took the chance to approach two more routes from the bucket list.
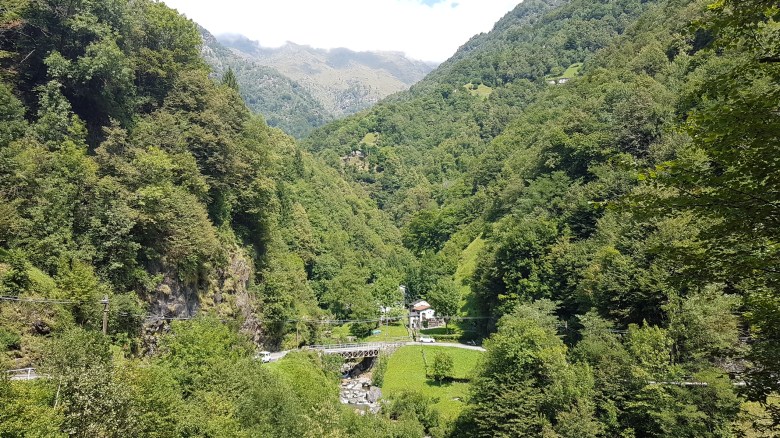
First up, a ride on the Eastern side of Lake Como, featuring the Valsassina, the Valvarrone, and, so was the plan, a 30km ride from Colico at Lake Como’s Northern end to Chiavenna, an old medieval street hub from which streets depart to Switzerland in Northern (Passo dello Spluga) and Eastern (Maloja-Pass) direction. Have been to Colico and have ridden both these streets to Switzerland, but never made the connection. Which left a gap on my Veloviewer map.
And the other day, I took a car rental to Darfo Boario Terme, just North of Lago d’Iseo. From there, I went West up to Angolo Terme. (The density of ‘terme’-labelled villages gives indication of the water richness and quality.) That was the first part of a long, 40km ascent to the top of the Passo del Vivione, which is maybe not the most famous mountain of all, but has a reputation as being very beautiful. After the descent, I linked up with existing routes of mine in Edolo, then returned by going down the Valcamonica which so far I only had passed with my Mum when last year we went on a hiking day trip at Passo Tonale.
Both trips gave me additional impressions on the gadget collection I had been using a few days ago, i.e. the Samsung Galaxy S7, the KiWiBiRD battery case, and the BiKASE mount for anything. Mostly confirmed my earlier impressions, but the BiKASE is worth some extra praise. I’ll get back to this below.
Day 1: Unfinished business on the way to Chiavenna
I started late for my standards, taking off from Lecco only at 11.00. Reason being that the girl had met her friend in Lecco as well and we had traveled together. As a result, it was piping hot already at the start. I took Via Petrarca/Milazzo/Gorizia/Mazzucconi (it’s one street, but changes the name three times) to get out of town in order to avoid some dense traffic, then followed the nicely wide SP62. It’s steep, though normally not too much, but I blew after the first half of the climb and then had to take out speed. Nice reminder to first find the rhythm and then go with speed.
Valsassina was not new to me. But last time, I had cycled it in the opposite direction. There is a beautiful cycle path between Pasturo (more precisely, it starts at a roundabout South of the city) and Taceno. That’s about 15km one direction and involves a height loss (or: gain) of about 200m. All asphalt, nice landscape along the trajectory, quiet, and on either end just a few kilometers away from Lago di Como. Just not well accessible for families without a car, as one would need to take main streets to get up from the lake.
New, however, was Valvarrone. To get there, I had three more climbs, and I’ve had enough of climbing after them. That day, it just felt a bit pointless even to me. The heat was really no big motivating factor. Landscape was nice, but not spectacular, and the final descent offered less lake panorama than what I had hoped for.

Yet, unfortunately the Italian weather forecast was accurate. There had been a warning of thunderstorms in the afternoon. My German weather report had predicted no rain, but the Italian counterpart had timed it spot on. As I came down to the lake, I could see the rain in the North, where I intended to go. I checked the rain radar and it looked like maybe it might be the last bit of rain already. So I decided to go North to Colico (something like 15km) instead of just finishing in Bellano (which would have been only 4km from where I reached the lake). I was surprised to still encounter so little traffic on the lakeside road, even though now it’s the peak of Italian and German Summer holidays.
In Colico, I wanted to re-assess, and then decided to stop it: I could literally see more rain forming on the opposite shore of the lake; I did not see a much cleared situation ahead of me; the rain radar now had shifted its predicted end-of-rain by one hour, and I assumed it was likely going to do that again. I was a bit dissatisfied, but already while waiting for the train, some earlier mild drops turned into heavier rain, and the news later reported how this had developed into one of the stronger thunderstorms of the season. The girl reported of this as well; she and her friend had intended to be camping), but got flooded in the tent and had to move to a hotel for that night.
Cute misunderstanding: I had understood they wanted to camp around Lecco, but they actually only met in Lecco and went camping close to Colico. I basically could have seen their tent from my route when riding into Colico.
Day 1: Finished business with a loop at Passo del Vivione
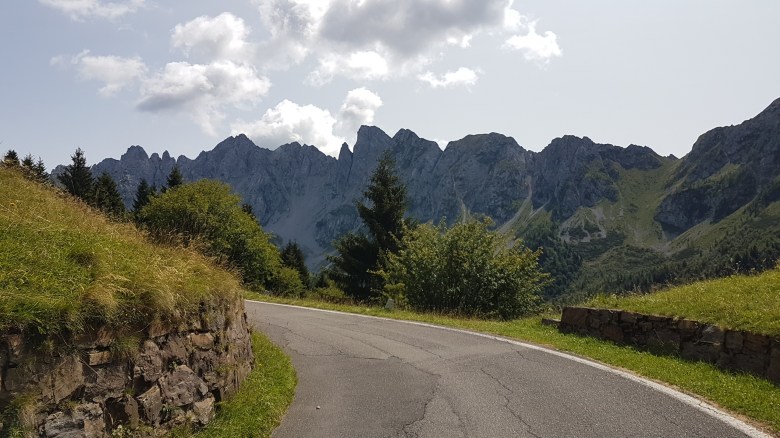
38km climbing is a number that is rarely found in European cycling. The Passo del Vivione cheats a bit in this respect. It’s not even 2,000m high, so the gradient is rather low over a big part of the climb. De facto, it’s two separate climbs with a false-flat in between. Likewise, it’s two sections that are truly special and must-see (both sections are about five to six kilometers in length). The first of these is the Via Mala di Scalve, not to be confused with the more famous Via Mala in Switzerland. Both indicate a very narrow canyon, though. The Via Mala di Scalve is potentially more impressive in Winter, when ice covers the old road which is now bypassed by some tunnels to make the street safe. It’s still very pure and rough in Summer. The second interesting section comes after Schilpario and then finishes at the peak of the pass. Here, the surroundings become most natural, least inhabited, and most impressively scenic. In that section, the street narrows down. It’s beyond my understanding how it can still fit cars going in opposite directions.


The rest of the day is told fast. After the descent, I made a quick loop to Edolo. I had been there before, refilled my water bottles, and enjoyed some ice cream for lunch. It started getting hot, but mostly now I had to go down. There was a smallish and hellishly steep climb in between that helped me to avoid the busy main-road. I thought. Until after the peak I would have led myself on a not very inviting looking forest road; so I actually went down again all the way to the main-road.
This main road splits in Berzo. From there, the traffic disappears on the highway-like SS42, while the former main-road just leads from village to village. It’s a safe route to take, even though there is also an even more remote bike route rolling over some hills at the edge of the valley. There’s only much sun and quite some small industry along the roadside. However, that one is not asphalted for most of it, and the gravel bits too loose to comfortably use with a road bike.
Regarding gadgets: How BiKASE saved my life
Like the weekend before, I had been using my new Samsung as the navigation device. Since the university is still closed, I also still had to use the KiWiBiRD case to mount the phone to the Quadlock. And I had again taken the BiKASE to carry a rain jacket, as I expected it to be rather fresh at 1,850m above sea level.
Samsung Galaxy S7 – GPS accuracy
In comparison to last week, I had left mobile internet turned on all time during the ride, and I had installed a GPS diagnostic app that many people have reported to have improved their GPS accuracy (GPS Status). The screenshots below easily indicate that neither was having big effects.


There is one set of hairpin turns where the GPS loosely followed my actual trajectory, but never got it spot on. In that section, the road was directly adjacent to steep rocks. One screenshot shows the effect of a tunnel. Instead of just connecting the first and the last point, it placed me 200m off the track. I think that it uses data for as long as it has any satellite reception, until it looses the last satellite necessary for triangulation. It might need a higher threshold, but that might fire back in other places. The third screenshot displays another set of hairpin turns. To be honest, these look fine to me, and I could totally live with these marginal inaccuracies. In this case, I was going down through a village. No steep rocks left or right, no narrow streets – easy to follow me. At least that works.
KiWiBiRD – Weight risk
Just as I had figured out how to dismount the KiWiBiRD safely and comfortably while riding, disaster struck. On the downhill from the Vivione, I noticed that the phone wobbled a bit more than usual. There had been a few potholes, but not too many and not too deep. Still, apparently it had broken part of my Quadlock mount, which therefore had lost one of the rubber ties to hold it. At least this time I noticed it before the phone fell. The Mum will be happy to read that I behaved responsible: Stopped and put the phone in the back pocket.
I can imagine that the rather hefty weight of the phone plus case might have played a role. Yes, this particular Quadlock mount is also ten years old. It could just be a pure coincidence that the plastic failed now. But obviously, heavier weight on the mount implies heaver burden for the mount’s weak parts. I can’t exclude that and therefore would say: One should be careful in using this case. Anyways, even with mobile internet on, having a phone call in between, looking up a few things online in a break… I still had 50% of the phone’s battery left when I reached the car again six hours later. Yes, I didn’t have the screen on for most of the climb and much of the downhill (I don’t need to see where I have to go when I know it anyways), but still: the extra power does not seem that necessary to me.
BiKASE
After the descent from the Vivione, I remembered that I had shown a product photo of the BiKASE to the girl two days before. That photo had also featured a phone mounted to the BiKASE. Back then, I had commented on this saying that I’d fear it might stretch the rubber ties too much, but now this looked like the only option to maintain instant map access. Given that I was still more than 60km away from the finish, I had little motivation to constantly have to stop to reach for the phone.
Obviously, with the BiKASE it’s impossible to just quickly take the phone for a shot. You need to stop. It also means that the rubber ties run over your screen, which may limit usability a small bit. I felt that initially it also moved a bit, until I took some one-sided tension off the ties. Most notably, the phone then rests at the front of the top tube, where it can catch sweat drops from me while going slow at high power (i.e. during climbs). But despite the big case, I didn’t touch it with my legs, and the phone was in a secure position. It’s not a long-term solution, but it’s a great temporary replacement (until I have access to my new Quadlock mount) and underlines the versatility of this inexpensive low-tech tool.
