
GoPro just released its Hero 7 camera lineup. Not much has changed between the Hero 6 and the Hero 7. Bikeradar nonetheless calls it the best one yet for cyclists. However, bike videos can be stunningly boring. I mean, take this video of a solo ride one week ahead of our 2017 Transalp. But don’t take it for long and instead come back and read on.
Much is wrong with this video. Sure, many of the wrongs regard the storytelling and the cutting. Some have to do with hardware. The audio is bad;the music ill-chosen. There is virtually no change in perspective: I keep filming the front.
A year has passed since and I think that my filming and editing has improved quite a bit. To that end, I’ve invested into some gadgets that make filming easier for me. In this post, I want to highlight seven of them.
#1 How to attach it to your bike: the handlebar mount
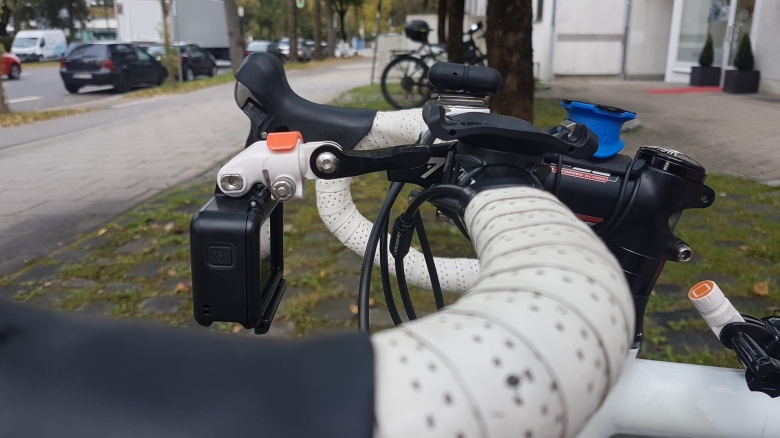
Think carefully about the mount. Integrated computer/GoPro mounts appear popular. Quadlock also offers such an integrated mount if you prefer your phone over a dedicated bike computer. I understand their benefits particularly on aero bikes with integrated handlebars with irregular shapes. It’s difficult to use standard GoPro handlebar mounts which require a radial handlebar shape. Instead, I use the K-Edge Go Big Pro handlebar mount.
That’s not necessarily un-aerodynamic. Specialized put the GoPro’s aerodynamic properties to test. The GoPro is a rectangular box. Yet they found that the GoPro’s impact is marginal (1w more drag at 45km/h). That was on an aero bike with a non-integrated handlebar.
There’s something that I love about the K-Edge mount and something that I hate about it.
I love that I can fully twist around the camera. The selfie-shot adds some small flexibility to the points-of-view. Even in that boring video above, such a selfie-shot features (0:56min into the video). It’s almost the best scene in six minutes.
I hate that no thin rubber fits between the mount and the handlebar. Where metal hits metal, small vibrations transfer into the audio track of the camera. GoPro’s wind noise reduction does its job against wind, but not against this kind of background noise.
#2 How to attach it to your bike: the Pro Standard adapter
About a year ago, I sent GoPro’s thumb screw into retirement when I bought an alternative mount system. Pro Standard is an amazing piece of kit. As I got a new delivery for my second camera, I’m going to prepare an unboxing and review post still this month.

In a nutshell: the Pro Standard adapter allows me to change the camera position without disconnecting the camera from the mount. At the same time, switching the camera from one mount to the other needs two clicks and five seconds.
There’s more to it. A typical kit involves some extras that help you to attach the GoPro to nearly anything. In case that you do stop to take a shot of you going down a mountain – you might not need to carry a tripod.
#3 The selfie stick
You need to be on the video: Your smile, your pain, your sweat, your gain, your pride, your brain. But you want to ride your bike. You don’t want to permanently stop and place your camera at the side of the road and turn it on, ride back a bit, film yourself, then pick the camera up again.
I use a very simple selfie stick. My former girlfriend had gifted me one of these GoPro accessory packages for Christmas. The selfie stick was part of the package. Including the Pro Standard adapter, the stick weighs 111g. GoPro’s own (more capable) selfie stick weighs 300g.
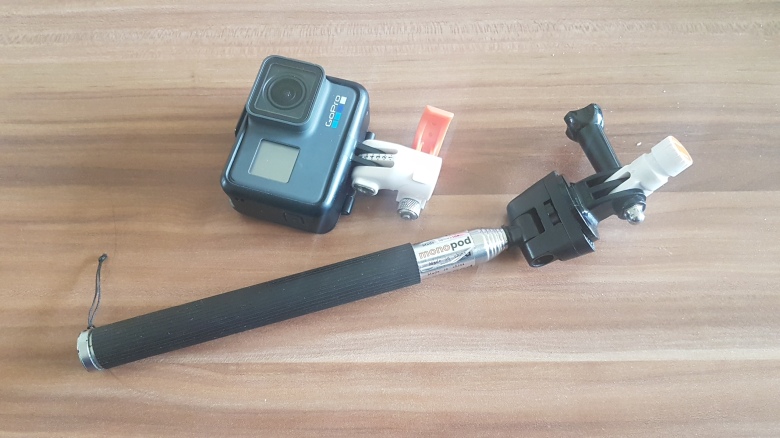
Here’s a thing that I really like about this cheap selfie stick: I don’t need to screw or to clip anything to lock the selfie stick at my desired length. I only pull it out and that’s it. Very likely, that mechanism has less long-term durability. Still, it’s faster to start and to stop shooting. I can adjust it easier if I get it wrong. Again, I don’t even need to stop. The only downside of this particular selfie stick: I have to use a tripod-to-GoPro adapter. (Note that the stick is part of a dedicated GoPro accessories bundle.)
Below is a video from the beginning of the season. It’s the first on which I carried the selfie stick on a bike. Compared to the Mortirolo, which featured in the first video, the scenery was dull and boring. Still, I like to watch it much more. I’m not just a camera man anymore, but a character.
On a day ride, I put the selfie stick in the back-pocket of my jersey. During the Transalp, the backpack covered the pockets. I needed to attach it to the bike. I found a simple solution. The cage of my bike lock (it’s an Abus Bordo Lite) has two Velcro straps. They are much longer than they need to be.
It’s the perfect spot to put the selfie stick. The Velcro keeps it secure. I can immediately access it, even while riding. Thanks to the Pro Standard system, I don’t need to stop to remove the camera from the handlebar and to attach it to the selfie stick.
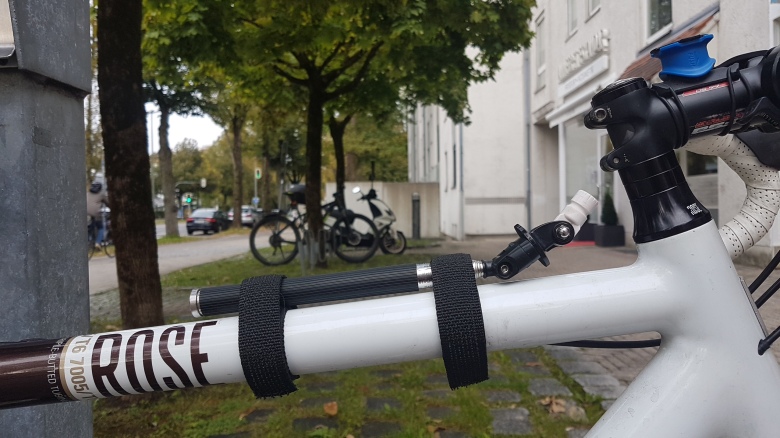

Yes, I need to clean my bike, and I’m aware that my saddle is somewhat worn down.
#4 How to mount the GoPro to your helmet: Knock Velcro out with Knog
To be honest: I’m not the biggest fan of helmet cameras for road cycling. I feel that things are different in mountain biking, when head or torso act somewhat like a gimbal compared to the shocks that an action camera has to absorb at the helmet. In road cycling, body movements instead add an element of instability that I want to avoid. In mountain biking, especially on trails, I keep focused on the trail ahead. On the road, I frequently look around to monitor upcoming traffic or just to enjoy the landscape.
I also have some reservations against most removable helmet mounts that I have seen. I don’t want to glue something permanently to my helmet. (It’s ugly.) But removable helmet mounts usually employ Velcro. I find it hard to get Velcro really tight. Often, this leaves a wild mess of Velcro wrapping around the helmet vents.
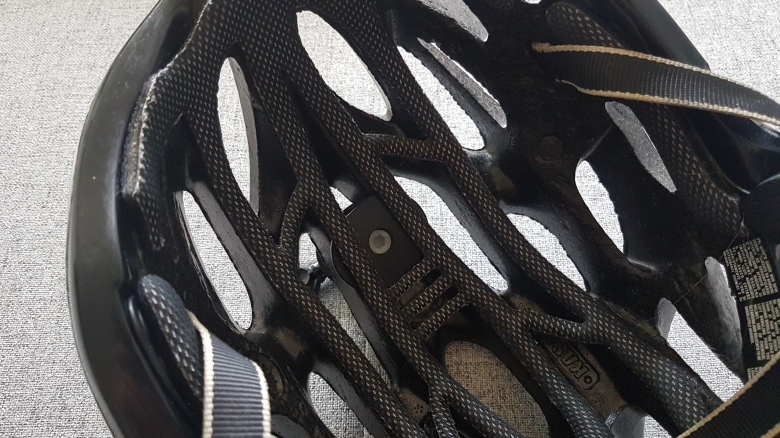
To that end, I’m much more happy with a product that Knog released this year. Their PWR system concentrates on lighting. (And it’s good.) However, the lights connect to the helmet via a standard GoPro tri-prong mount. So I can just also use it directly as a GoPro mount.

The advantages are obvious: It’s definitely compatible to any helmet. With a standard multi-tool, assembly takes 30 seconds. It holds tight, reliable, and without the typical Velcro flex.
#5 How to get better sound: the Instamic external microphone
Despite wind noise reduction and regardless of additional noise from the mount: The GoPro’s inbuilt microphone isn’t the best. The muffled audio during action sessions can cause frustration. More professional GoPro filming employs external microphones. Unfortunately, GoPro wants you to use a clunky microphone adapter. There’s not much left of a small, action-ready camera.

I hope that Instamic will become my solution to this problem. Instamic originally funded its product via crowdfunding on Indiegogo. I missed that. Anyways, there was the usual big delay. They are alive, though, and the product is great. I got in touch with them and still could purchase one. With further delay due to shipping issues, it reached me.
There’s a flip-side to it: I didn’t get to practice enough with it before the Transalp. As a result, I didn’t have a good feeling for how to integrate it into my filming routine. In an upcoming separate review, I’ll talk about my happiness and my issues with it.
#6 How to attach the microphone to your bike: the magnetic Pully mount
Generally, I could attach the Instamic magnetically to my jersey. I opted for a handle-bar solution in order to see the recording state of the Instamic. Luckily, I still had another unused Kickstarter product lying around: the Pully.
Originally I bought Pully as a magnetic mount for the phone of my former girlfriend. We split before the Pully arrived. But the Instamic has a magnetic underside. The Pully got back into contention as a useful product. It’s not super lightweight: 59g exceeds the weight of GoPro’s microphone adapter (27g).

#7 How to get more control of your GoPro: the GoPro Remo
This is the last piece for a reason. All the items mentioned above have had a profound impact on my shooting. Not so much for the Remo. In practice, I mostly use the Remo on descents. In all other situations, I can reach the shutter button safely and save some battery. I also don’t mind to start it and to have to cut away some bit – I cut my videos anways.

But on a curvy descent with traffic at more than 50km/h, I don’t want to have to fiddle with the shutter button. Just that I do exactly that as well every time I forget to turn the Remo on. I forget it quite often.
For now, the Remo is difficult to get. And anyways expensive. I was lucky to find a deal for just 50,- EUR. I’ve heard rumors than GoPro might release an updated Remo with an integrated microphone. That could be awesome.
Bringing it all together: much better videos
I opened this entry with a boring video from a solo ride 2017. I had the GoPro, the K-Edge mount, and the Remo. The Pro Standard adapters would arrive two days later. Fast forward almost a year, I went to see the professionals at the Giro d’Italia. On yet another solo ride, all the pieces came together (except for the Instamic). I think that the difference is noteworthy. But judge for yourself.
